From the previous posts you have learned to create a simple webpage. You have also learned to create divs and learned to customize them using CSS. In this post I will show how to create a webpage with all basic elements like header, menu, body/content area, sidebar and footer.
Step 01 Create some divs
You have already learned detail about most of the codes given below from the previous posts. Inside the <body> and </body> tags I have created a div with a class mainContainer. Then inside that div I have created another four divs with the classes header, menu, contentArea and footer.
These four divs are four main sections of the webpage we are going to create and they are inside the main section mainContainer.
I have also customized the parent div using some simple CSS, that I have discussed in the previous posts.
These four divs are four main sections of the webpage we are going to create and they are inside the main section mainContainer.
I have also customized the parent div using some simple CSS, that I have discussed in the previous posts.
<!DOCTYPE html>
<html lang="en">
 <head>
  <meta charset="UTF-8">
  <title>iDhali</title>
  <style type="text/css">
   .mainContainer{
    margin: auto;
    width: 960px;
    border: 1px solid #333;
   }
  </style>
 </head>

 <body>
  <div class="mainContainer">
   <div class="header">
    Hearder
   </div> <!-- End of header -->

   <div class="menu">
    Menu
   </div> <!-- End of menu -->

   <div class="contentArea">
    Content Area
   </div> <!-- End of contentArea -->

   <div class="footer">
    footer
   </div> <!-- End of footer -->

  </div>
 </body>
</html>
Step 02 Customizing Header of the webpage
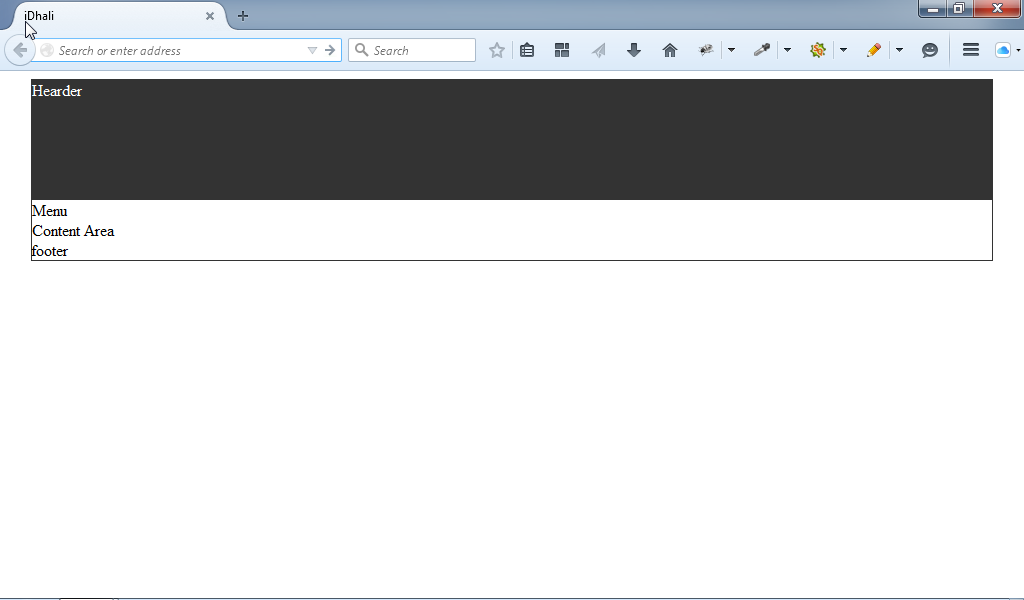
Now we will customize the div with the class header. First of all use the CSS codes given below to customize the header part. In the CSS given below height, background-color and color is defined. Later we will customize the header finally.
After customizing the header, the webpage will look like the image given below.
.header{
 height: 120px;
 background-color: #333;
 color: #fff;
}
After customizing the header, the webpage will look like the image given below.
Step 03 Customizing the footer of the webpage
After customizing the header, now we will customize the footer also. Let's use the CSS codes given below to customize the footer.
After adding the above CSS codes for the footer, the webpage will look like the image given below.
.footer{
 height: 90px;
 background-color: #333;
 color: #fff;
 text-align: center;
}
After adding the above CSS codes for the footer, the webpage will look like the image given below.
Step 04 Adding sidebar to the existing webpage
In this step we will work with the contentArea and the menu part will be completed later. Lets create two more divs inside the div of class contentArea. And the news two divs will be with the classes content and sidebar. The change of the contentArea is given below.
The newly added two divs will be used to hold the main content of the page and to show a sidebar at the right side.
The newly added two divs will be used to hold the main content of the page and to show a sidebar at the right side.
<div class="contentArea">
 <div class="content">
  Content
 </div> <!--End of Content-->

 <div class="sidebar">
  Sidebar
 </div>
</div> <!-- End of contentArea -->
Step 05 Customizing the newly added two div
Now we will customize the new two divs using the CSS given below. Besides we will add some dummy texts inside the div with class content.
!important
contentArea is a div and inside this div there are two more divs of class content and sidebar. I have defined the 660px width for the content div and 300px width for the sidebar div. That means 660px+300px=960px
.contentArea{
 display: -moz-box;
 -moz-box-orient: horizontal;
 display: -webkit-box;
 -webkit-box-orient: horizontal;
}

.content{
 width: 660px;
}

.sidebar{
 width: 300px;
}
!important
contentArea is a div and inside this div there are two more divs of class content and sidebar. I have defined the 660px width for the content div and 300px width for the sidebar div. That means 660px+300px=960px
Step 06 Add some padding
Now we have to add some padding for the container, content and sidebar. So the total CSS will be...
Finally the webpage will look like the image given below.
<style type="text/css">
 .mainContainer{
  margin: auto;
  width: 960px;
  border: 1px solid #333;
  padding: 5px;
 }

 .header{
  height: 120px;
  background-color: #333;
  color: #fff;
 }

 .contentArea{
  display: -moz-box;
  -moz-box-orient: horizontal;
  display: -webkit-box;
  -webkit-box-orient: horizontal;
 }

 .content{
  width: 650px;
 }

 .sidebar{
  width: 295px;
  margin-left: 5px;
 }

 .footer{
  height: 90px;
  background-color: #333;
  color: #fff;
  text-align: center;
 }
</style>
Finally the webpage will look like the image given below.


No comments:
Post a Comment