Friday, November 14, 2014

Program to show the result of addition of two numbers


Objectives
-to learn to create an assembly language program for addition
-to learn to add two numbers
-to learn how to keep data (number) using variables
-to learn the uses of variables
-to learn to use the data of variables
-to understand the uses of SUM operation
addition using assembly program,primary level programming,uses of arrays
.MODEL SMALL
.STACK 100H
.DATA
A DW 2
B DW 6
SUM DW ?

.CODE
MAIN PROC
MOV AX,@DATA
MOV DS,AX

MOV AX,A
ADD AX,B
MOV SUM,AX

MOV AX,4CH
INT 21H

MAIN ENDP
END MAIN

Assembly Language Program to show the “Hello World!” message


Objectives
-to start assembly programming by the Hello World program
-to understand the basic structure of assembly language programing
-to learn to show a specific message
-to learn to use variables
hello world program,assembly language program
.MODEL SMALL
.STACK 100H
.DATA
MSG DB 'Hello World!$'

.CODE
MAIN PROC

MOV AX,@DATA
MOV DS,AX

LEA DX,MSG
MOV AH,9
INT 21H

MOV AH,4CH
INT 21H

MAIN ENDP
END MAIN

Saturday, October 11, 2014

C program to check a year whether it is leap year or not


The C program given below is a program that will ask you a year showing a message Enter a year: . When you will input a year using the keyboard, then the program will check whether it is a leap year or not. Most of the description of the codes are given after the statement in different color. Ignore the description when you will type the program in a compiler like Turbo C, CodeBlocks etc.
c program,leap year program

#include<stdio.h>
#include<conio.h>

main()
{
int year; /*Declaring an integer type variable called year*/

printf("Enter a year: "); /*Showing a message*/
scanf("%d",&year); /*Getting value from keyboard*/

if(year%4==0) /*Checking if the data is divisible by 4*/
{
printf("The year is leap year"); /*If the year is divisible by 4, then showing a message*/
}

else
{
if(year%100==0) /*Again checking, if the data is divisible by 100*/
    {
if(year%400==0) /*Again checking, if the data is divisible by 400*/
{
     printf("the year is leap year"); /*If the year is divisible by 100 and 400, then showing a message*/
}
    }

else
printf("the year is not leap year"); /*If all the conditions are wrong, then showing a message*/
}
getch();
}


Friday, October 10, 2014

Responsive Menu 04: Adding a clickable button to the responsive menu


In the previous post we make the menu responsive. Now we will add a clickable button to control the menu. And we will also add mouse hover effect for better looking. Let's follow the steps to do so.

 Step 01  Add some more codes inside of the @media section
To add the clickable button, we need to add the line <span class="nav-btn"></span> just after the opening <body> tag of the menu.html page. Then open the menu.css file and add the codes given below after the existing codes inside of @media section.

.nav-btn {
        display: block;
        background-color: #333;
        color: #fff;
        font-family: 'helvetica neue', helvetica;
        font-size: 14px;
        text-align: left;
        cursor: pointer;
        padding: 5px;
    }

    .nav-btn:before {
        content: "Menu";
    }

 Step 02  Save the CSS file and reload the menu.html file
Now save the menu.css file and reload or reopen the menu.html file. Then we will get a menu as like as the image below.

 Step 03  Change the background color and the font
We need some more customization for the main menu. Change the background-color to #333 and add the line font-family: 'helvetica neue', helvetica; , then the font will look more beautiful as like as the image given below..

#menu{
background-color: #333;
font-family: 'helvetica neue', helvetica;
}

After changing the background color

 Step 04  Let's add hover effect to the menu
Still there is no any hover effect added to the menu. To add hover effect, we need to add the codes given below. The codes should placed before the @media section. After adding the codes, save the menu.css file and reload the menu.html file. Then you will get the effect as shown in the image below.

#menu li:hover{
background: #ef1c25;
}


Tuesday, October 7, 2014

Run your first assembly program in DOSBox


From the previous post we have learned to install DOSBox and to configure it so that we can run the programs written in Assembly Language. Now we have to write the hello world program and need to run that program using DOSBox.

 Step 01  Open notepad or any other text editor
First of all we need to open Notepad or any other text editor. To open notepad press Windows Key+R and then type Notepad into the command box, finally press the Enter Key.

 Step 02  Type the program given below
Now type the codes given below...

.MODEL SMALL
.STACK 100H
.DATA
MSG DB 'Hello World!$'

.CODE
MAIN PROC

MOV AX,@DATA
MOV DS,AX

LEA DX,MSG
MOV AH,9
INT 21H

MOV AH,4CH
INT 21H

MAIN ENDP
END MAIN

 Step 03  Click on Save As...
Now we need to save the text document with .asm extension. That's why we need to click on File from the menu, then we need to click on Save As... as shown in the image below.

 Step 04  Save the file with .asm extension into the folder 8086
After clicking on Save As... , a pop-up window will open as the image given below. Now we have to provide our expected name with .asm extension and most importantly we have to save the .asm file into the directory Local Disk(C:)>8086.

 Step 05  Run the DOSBox and mount the C Drive
Now we need to run DOSBox to execute our hello world program. After running the program we will get a window like the image below. Then we need to type mount c c:/8086 and need to press the Enter Key.
After pressing the Enter Key there will appear a message Drive C is mounted as local directory c:/8086\.

 Step 06  Type c: and press the Enter Key
In this step we have to type c: and need to press the Enter Key again.

 Step 07  Run the hello world program
Now type masm hello.asm and press the Enter Key several times till appearing c:\>. Then type link hello and again press the Enter Key several times till appearing c:\>. Finally type the file name hello and press the Enter Key, then the Hello World! message will appear on the screen.


Sunday, August 31, 2014

Change firefox browser's default homepage to your expected page


By default the homepage in Mozilla Firefox in mozilla's start page. But we may change it to our expected page. Lets see how to change the homepage in Mozilla Firefox.
firefox,browser,homepage,internet tips and tricks

 Step 01  First of all click on the Settings Icon
Click on the Settings Icon of the Mozilla Firefox browser as shown in the image below. The icon is located at the rightmost upper corner of the browser.

 Step 02  Click on Options from the drop-down menu
After clicking on the settings icon a drop-down menu will open as like as the image below. Now click on the Options icon as shown in the image below.
homepage,firefox,browser,mozilla,internet tips and tricks

 Step 03  Provide the homepage and save the settings
After clicking on Options a pop-up window will open as like as the image below. Now go to the General Tab if you are not there and add the home page as I have added in the image. Finally click on the OK Button to save your settings.


Saturday, August 30, 2014

Adding snowfall to a website using JavaScript codes


JavaScript is used to add different types of text effects and many more. In this article you will learn to add continuous snowfall on a webpage. Lets add a snowfall effect following the steps given below. You may also add any other letter instead of snow. Suppose you want to add F, then the letter F will fall randomly on the website in different sizes and in different colors.
javascript,snowfall,website designing

 Step 01  Create a simple webpage first
You have to create a simple webpage first to test the snowfall. But if you already have a website then you can apply the snowfall there. To create a webpage, press Windows Key + R buttons together. Then the RUN Command Box will open. Now type notepad into the RUN Command Box and press the Enter Key. A new notepad document will open, now type the codes into the notepad document.
<html>
<head>
   <title>Snowfall</title>
</head>
<body bgcolor="#1E5B82">
   Your content here
</body>
</html>

 Step 02  Paste the codes before the </head> tag
Now you have to add the following JavaScript codes to your webpage. So copy the codes from the box below and paste them before the closing head tag </head>.
<SCRIPT type="text/javascript">
var snowmax=35
var snowcolor=new Array("#aaaacc","#ddddff","#ccccdd","#f3f3f3","#f0ffff")
var snowtype=new Array("Times","Arial","Times","Verdana")
var snowletter="*"
var sinkspeed=0.6
var snowmaxsize=30
var snowminsize=8
var snowingzone=1
var snow=new Array()
var marginbottom
var marginright
var timer
var i_snow=0
var x_mv=new Array();
var crds=new Array();
var lftrght=new Array();
var browserinfos=navigator.userAgent
var ie5=document.all&&document.getElementById&&!browserinfos.match(/Opera/)
var ns6=document.getElementById&&!document.all
var opera=browserinfos.match(/Opera/)
var browserok=ie5||ns6||opera
function randommaker(range) {
        rand=Math.floor(range*Math.random())
    return rand
}
function initsnow() {
        if (ie5 || opera) {
                marginbottom = document.body.scrollHeight
                marginright = document.body.clientWidth-15
        }
        else if (ns6) {
                marginbottom = document.body.scrollHeight
                marginright = window.innerWidth-15
        }
        var snowsizerange=snowmaxsize-snowminsize
        for (i=0;i<=snowmax;i++) {
                crds[i] = 0;
            lftrght[i] = Math.random()*15;
            x_mv[i] = 0.03 + Math.random()/10;
                snow[i]=document.getElementById("s"+i)
                snow[i].style.fontFamily=snowtype[randommaker(snowtype.length)]
                snow[i].size=randommaker(snowsizerange)+snowminsize
                snow[i].style.fontSize=snow[i].size+'px';
                snow[i].style.color=snowcolor[randommaker(snowcolor.length)]
                snow[i].style.zIndex=1000
                snow[i].sink=sinkspeed*snow[i].size/5
                if (snowingzone==1) {snow[i].posx=randommaker(marginright-snow[i].size)}
                if (snowingzone==2) {snow[i].posx=randommaker(marginright/2-snow[i].size)}
                if (snowingzone==3) {snow[i].posx=randommaker(marginright/2-snow[i].size)+marginright/4}
                if (snowingzone==4) {snow[i].posx=randommaker(marginright/2-snow[i].size)+marginright/2}
                snow[i].posy=randommaker(2*marginbottom-marginbottom-2*snow[i].size)
                snow[i].style.left=snow[i].posx+'px';
                snow[i].style.top=snow[i].posy+'px';
        }
        movesnow()
}
function movesnow() {
        for (i=0;i<=snowmax;i++) {
                crds[i] += x_mv[i];
                snow[i].posy+=snow[i].sink
                snow[i].style.left=snow[i].posx+lftrght[i]*Math.sin(crds[i])+'px';
                snow[i].style.top=snow[i].posy+'px';

                if (snow[i].posy>=marginbottom-2*snow[i].size || parseInt(snow[i].style.left)>(marginright-3*lftrght[i])){
                        if (snowingzone==1) {snow[i].posx=randommaker(marginright-snow[i].size)}
                        if (snowingzone==2) {snow[i].posx=randommaker(marginright/2-snow[i].size)}
                        if (snowingzone==3) {snow[i].posx=randommaker(marginright/2-snow[i].size)+marginright/4}
                        if (snowingzone==4) {snow[i].posx=randommaker(marginright/2-snow[i].size)+marginright/2}
                        snow[i].posy=0
                }
        }
        var timer=setTimeout("movesnow()",50)
}
for (i=0;i<=snowmax;i++) {
        document.write("<span id='s"+i+"' style='position:absolute;top:-"+snowmaxsize+"'>"+snowletter+"</span>")
}
if (browserok) {
        window.onload=initsnow
}
</SCRIPT>

 Step 03  Save the document as an html file
Now save the document as an html file. To do so, click on File from the menu and go to Save As... Then a pop-up window will open. Now provide a name with .htm or .html extension into the text input box. For example: idhali.htm or idhali.html Finally click on the Save button to save the document as a webpage.

Make some changes if you want

Look at the codes above in the box. There are some text in red color. You may change them to make some changes in the snowfall.

First of all you may change the in the second line var snowmax=35. 35 is here the number of snowflakes and you may change the number from 30 to 40. 30-40 is the recommended number of the snowflakes.

You may also change the color of the snowflakes changing the color of the following line. This is the third line of the above codes.
var snowcolor=new Array("#aaaacc","#ddddff","#ccccdd","#f3f3f3","#f0ffff")

Change the fonts replacing the fonts name of fourth line of the above codes. You may also add more fonts if you want.
var snowtype=new Array("Times","Arial","Times","Verdana")


Friday, August 29, 2014

Create an animated fancy marquee using HTML codes only


-> > >www.iDhali.com< < <-
During developing a website we use different types of languages and/or tricks to create different types of animations. You have already noticed the above text. I have created this animation using only some HTML tags. Actually I have used the <marquee> tad with some special attributes to create the above animation. The codes I have used is given below into the box.
<marquee behavior="alternate" direction="left" scrollamount="3" width="15%">
-
</marquee>

<marquee direction="left" scrollamount="1" width="4%">
> > >
</marquee>

THANKS FOR VISITING iDhali

<marquee direction="right" scrollamount="1" width="4%">
< < <
</marquee>

<marquee behavior="alternate" direction="right" scrollamount="3" width="15%">
-
</marquee>

Description for the above codes

Mainly I have used two sets of <marque> tag to make this possible. First of all I have run the - sign using a <marquee> with some special attribute. Look at the codes given below, I have used the <marquee> with the attributes behavior="alternate" direction="left" scrollamount="3" width="15%". These codes I have used to run the - sign of the left side. The same sign I have run at the right side using the same tags and attributes but I have changed the value for the attribute direction="". I have used right as the value to run the - sign from left to right.

<marquee behavior="alternate" direction="left" scrollamount="3" width="15%">
-
</marquee>
marquee,animated html,html animation

I have used another set of codes to run the > and < signs. The codes I have used to run the > sign from right to left is given below. The same codes I have used to run the < sign from left to right changing the attribute direction="right".

<marquee direction="left" scrollamount="1" width="4%">
< < <
</marquee>

- > > > Thanks for visiting iDhali < < < -


Creating a simple webpage using notepad only


From this post you will learn to create a webpage using the simple text editor notepad only. You may also use notepad++, sublimeText etc. instead of notepad. There are several ways of creating webpages using several languages. But you must know the basic HTML and CSS to create webpages and to style them.

In advance level you have to learn PHP, JavaScript,  jQuery, mySQL etc. Frameworks like Bootstrap, Laravel are also essential to develop a standard website.

Besides you have to know the CMS Wordpress or something like this to be a professional. Let's start your journey by creating a very simple webpage. Stay tuned with me to learn more about it. Feel free to contact with me for further assist.
 Step 01  Open the text editor notepad
First of all you need to open the text editor notepad. You may also use any other text editor like sublime text, notepad++ etc.

However notepad is available with every windows computer, that's why I have chosen notepad. Go to Start Menu>All Programs>Accessories>Notepad and open the notepad program.

Or simply press Windows Key+R together to open the RUN Command Box, then type notepad into the text input box and press the Enter Key to open a notepad document.
first webpage,webpage designing,html tutorial
 Step 02  Type the codes into the notepad document
Now type the code given below into the notepad document and save them as an html file following the next step.

<!DOCTYPE html>
<html lang="en">
 <head>
  <meta charset="UTF-8">
  <title>iDhali</title>
 </head>
 <body>
  <h1>This is a Header</h1>
  <p>This is a Paragraph</p>
  <b>This is Bolded Text</b>
  <i>This is Italic Text</i>
  <u>This is Underlined Text</u>
 </body>
</html>
 Step 03   Save the document as an html file
Now save the document as an html file. To do so, click on File of the menu bar, a drop-down menu will open. Then click on Save As... from the menu and save the document with .htm or .html extension. For example: iDhali.htm or iDhali.html.

 Step 04  Open the .html file in a browser
Now locate the html file and double click on it to open. The file will open in the default web browser software installed in your computer. After opening the html document you will get something written like this...

This is a Header

This is a Paragraph
This is Bolded Text
This is Italic Text
This is Underlined Text


Recommended posts...

» Create a webpage without using any HTML tag
» 20+ Questions and Answers about HTML

Next Tutorial »


Advertisement


Thursday, August 28, 2014

Lock folders and/or files using WinMend

We all the computer users have some personal data stored in our computers. Most often we keep them hidden normally or using folder hidden software. We use different types of tips and tricks also to hide our files and folders.

WinMend is such a software able to hide & lock files and/or folders. That's why WinMend is not only a folder hidden software but also a folder locker software. You can hide & lock a lots of files and folders at a time using WinMend.

Download the WinMend software from here. Then install it in your computer, installation process is simple like all other software.

Why you will use WinMend?


01. You can hide your expected files and/or folders
02. You can lock your files and folders with password
03. Then nobody will be able to access your data without providing the correct password
04. It is so easy to use and reliable
05. No chance of losing any important data.
07. Full free trial version is available
folder hide, password protect for folder, folder hidden software


Change the chrome browser's default homepage to your expected page


When we open a browser, then by default the preset page open automatically. Later we have to type a new URL into the address bar to visit. Suppose you like to visit my website daily. But you have to run a browser, then you need to type the URL and finally you have to press the Enter Key to visit my site. If you set this website as your homepage, then you will be able to visit this site just after opening the browser. It is so easy and obviously time saving. You may set any of your favorite and/or important page as the homepage to save your time. Lets see how to change the homepage in google chrome browsers.
homepage,google chrome,change browser's homepage

Change Homepage in Chrome


 Step 01  Click on the chrome settings button
Find out the settings button located at the rightmost upper corner of the Chrome Browser and click on it. The settings button is shown below in the image.

 Step 02  Click on Settings from the menu
After clicking on the settings button a menu will open as shown in the image below. Now you have to click on Settings to open the settings page. The settings page will open in a new tab.

 Step 03  Click on the link Change
In the settings page there you will get a link named Change into the Appearance section. Now you have to click on this link.

 Step 04  Provide the URL and save the settings
After clicking on the link Change, a pop-up window will open. Now click on the radio button Open this page and provide the URL of the page you want to save as the homepage. Finally click on the OK button to save the settings.


Wednesday, August 27, 2014

Make a pen drive bootable and install windows using it


Generally we use the CD/DVD drive to install a operating system. But you may also install an operating system using your pendrive. To do so, you have to burn the prendrive first. To burn a pendrive you need an ISO file of the operating system and a software. You may download the ISO from internet and the software you need is given below.
bootable usb flash drive,bootable pen drive

 Step 01  Make an OS ISO or download the ISO file
To make a pen drive bootable you need the ISO file of the operating system. You may create ISO file using a ISO burner software or simply download the ISO file of that operating system you want to install.

 Step 02  Insert a pendrive and run the software
Now insert a pendrive of 8GB minimum and download the software from here. Double click on the .exe file to run it. You will get a window like the image given below.

bootable,os,pendrive

 Step 03  Select the ISO file of the operating system you want to burn
Look at the above image, there is showing the pendrive under the writings Device. You will also get information about your inserted pendrive if that is connected properly. Now click on the icon where the mouse pointer is kept and select the ISO file of the operating system you want to burn into the pendrive.

 Step 04  Click on the Start Button after selecting the ISO file
After selecting the ISO file, click on the Start Button. Then you will get a warning like the image below.

operating system,pendrive,bootable pendrive

 Step 05  Click on the OK Button to continue the process
The message is saying all the data of the pendrive will be destroyed to continue the process. Now you have to click on the OK Button or keep away the data if exist in your pendrive. After clicking on the OK button, the process will start and it will take a few minutes to complete.


What to do after failing third time to get the PIN from AdSense

There are some steps we have to pass carefully to be paid by Google AdSense. Receiving PIN number is one of them. Let me tell my experience about receiving PIN number and unholding my Google AdSense Payment. When my AdSense Earnings reached to 10.33$, then I noticed that there is written "Your Payments are on Hold". Then I googled and came to know that I have to request Google to send me a PIN number, later I have to enter the PIN number to unhold the payment. I also came to know that one can request three times only for the PIN number. I requested three times but failed to receive the PIN number.

It takes three or four weeks to reach the PIN Number. So you are able to request a new PIN only after 4 weeks of the previous issued date. So I wasted about three months to get my PIN number and at last failed. Then what I did after failing to receive the PIN Number?

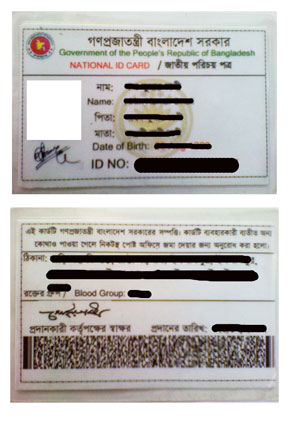
I sent a mail to Google Authority attaching the Digital Image of my National ID Card as shown below. I took the image of the both side of my National ID Card. Then I edited those two image using Photoshop to make them one.

What is adsense, adsense, online earning, earn with adsense, google adsense
The image showing in the left side is that digital image of my National ID Card that I sent to Google AdSense Authority to Unhold my Adsense Payment. You have to also do the same if you fail third time to receive the PIN number. They took a few hours to Unhold my Payment. You may also send an image of your Driving License or any other documents that represent your identity correctly.

You also have to provide some information about the Tax information after unholding the payment. Provide the correct information about the tax of your locality. It will take a few minutes only and most importantly it is on your hand.

I faced so horrible moment when my AdSense Payments were hold. The AdSense Ads were invisible on my webpages. That's why all of my created Ads became idle. My earning was also zero in those months. There was my faults also. I thought that I would unhold my payment later. Because, I wanted to change my city. So I waited for a few weeks to send the second request. However you should unhold your AdSense Payment as soon as possible.


Sunday, August 24, 2014

Download YouTube video easily adding ss only with the URL


We upload and watch different types of videos using YouTube. Sometimes we need to download videos from YouTube. But it is a little bit of difficult to download videos from this site. Let's know an easy way to download your necessary videos.
download youtube video,download video
 Step 01  Add ss with URL of the video you want to download
First of all found the video you want to download. Now add two extra ss just after www. of the URL and press the Enter Key simply. One image is given below for better understanding. Let's see I have added ss with the original URL of the video I want to download.

 Step 02  Click on Proceed if you get any security alert
After pressing the Enter Key you may get an security alert message. You have to click on the Proceed Key to go to the next step. Then you will get a page like the image below. There you will found different format of the video after the writings Download links. Click on More to get more format of the video.
YouTube Video Download,Easily Download YouTube Video

 Step 03  Right click on the link to get the menu
Now click on the link MP4 360p to download the video. You may also right click on the link as I have shown in the image below. Then you will get a pop-up menu as like as the image if there is installed Internet Download Manager downloader software in your computer.
IDM,YouTube,FreeDownload

 Step 04  Click on Start Download to start downloading
Now click on Download with IDM from the menu and you will get a pop up window as like as the image below. Finally click on the button Start Download to start download.
Thus you may download any video from YouTube easily in your expected resolution.


Wednesday, August 20, 2014

Create a webpage without using any HTML tag


Watch the video given below to learn to create a webpage without using any HTML tag. You need the notepad text editor only. This is the very first step of website designing. Share this video if you think it is helpful for all others. Subscribe my YouTube Chanel for the next videos.

If you are unable to watch the above video then follow the steps given below
to do the same described above.

 Step 01  Open the Notepad Text Editor
Normally press Windows Key+R together to open the RUN Command Box. Now type notepad into the text input box and press the Enter Key.

 Step 02  Type anything you want to show
Now type anything (for example: Hello World!) into the Notepad you want to show. You needn't to use any code here as said above.
website designing,beginners html,web programming
 Step 03  Save the notepad document with .html or .htm extension
Now you have to save the document clicking on File from the menu. A drop-down menu will open. Then click on Save as...

After clicking on Save as... a pop-up window will open. Now type a name into the File Name text input box with the extension .html or .htm and finally click on the Save button. For example: The file name may be hello.html or hello.htm.

 Step 04  Check your newly created webpage now
Locate the html file you have created just before a while and double click on that. Look, the file is with the icon of a browser you are currently using. After double clicking on the webpage, it will open in your default web browser and you will get the message you kept.

 Step 05  Change the Color and the Size of the Text
Now we'll use an HTML Tag and two Attributes to change the color and size of the text. Look the codes are given below into the box. We'll actually use the <font> tag with two attributes. <font> is the opening tag and we must use the closing tag </font>. And the text will be inside the <font> and </font> tags. Let's add two attributes size="20px" and color="blue".  The example is given below.

<font size="20px" color="blue">Your Text Here</font>

 Step 06  Save the webpage again
After adding the line given above, finally save the html document again and open that using a web browser.


» Let's create a webpage using all necessary HTML tags
» Read 20+ common questions and answers about HTML